How To Replace Bathtub Faucet: A Complete DIY Guide That'll Save You Big Bucks
So, you've finally decided to tackle that bathtub faucet replacement project yourself? Good move, champ! Replacing a bathtub faucet isn’t just about fixing a leak or upgrading your bathroom—it’s also a fantastic way to save some serious cash and gain some mad DIY skills. Whether you're tired of that annoying drip or simply want a sleek new faucet, this guide has got your back. Let’s dive right in and make that bathtub shine like it's brand new!
Look, let’s face it—calling a plumber can be expensive, and sometimes it feels like they're just there to drain your wallet. But here's the thing: replacing a bathtub faucet isn’t rocket science. With the right tools, a little patience, and this step-by-step guide, you can do it yourself and feel like a total pro. Plus, you’ll have the satisfaction of knowing you fixed it yourself!
Now, before we get into the nitty-gritty details, let’s talk about why this project is worth your time. A new faucet can transform your bathroom, making it look fresh and modern. It’s one of those little upgrades that can make a big difference, and trust me, your friends will be impressed when they see your handiwork. Ready to get started? Let’s go!
Read also:Is Megan Moroney A Liberal Exploring Her Political Identity
Why Replace Your Bathtub Faucet?
Before we jump into the how-to part, let’s first understand why you might need to replace your bathtub faucet in the first place. Sure, it might seem like a small issue, but trust me, a faulty faucet can cause more problems than you think. Here are a few reasons why replacing your bathtub faucet could be a game-changer:
- Leaking Faucet: A dripping faucet isn’t just annoying; it can waste gallons of water over time. That means higher water bills and unnecessary waste.
- Aesthetic Upgrade: If your faucet looks outdated or rusty, it’s time for an upgrade. A new faucet can give your bathroom a fresh, modern look.
- Improved Functionality: Older faucets might not work as efficiently as newer models. Upgrading can give you better water pressure and temperature control.
- Energy Efficiency: Modern faucets are designed to be more energy-efficient, which can help reduce your energy bills in the long run.
Tools and Materials You'll Need
Alright, champ, let’s talk about what you’ll need to get the job done. Having the right tools and materials is crucial for a successful DIY project. Here’s a quick list of everything you’ll need:
Tools:
- Adjustable Wrench
- Plumber’s Tape
- Screwdriver
- Bucket
- Allen Wrench
- Channel-Lock Pliers
Materials:
- New Bathtub Faucet
- Teflon Tape
- Silicone Sealant (optional)
Make sure you have all these tools and materials ready before you start. Trust me, it’ll save you a lot of hassle and trips to the hardware store.
Step-by-Step Guide to Replacing Your Bathtub Faucet
Now that you’ve got everything you need, let’s get down to business. Follow these steps carefully, and you’ll have your new faucet installed in no time.
Step 1: Turn Off the Water Supply
This is a crucial step, so don’t skip it! You’ll need to locate the shut-off valves under the bathtub or near the water heater. Turn them off to ensure there’s no water flowing through the pipes while you work. If you can’t find the shut-off valves, you might need to turn off the main water supply to your home.
Step 2: Drain the Remaining Water
Use a bucket to catch any remaining water in the bathtub. This will prevent any mess while you’re working. You can also turn on the faucet to let out any trapped water in the pipes.
Read also:Chinese New Year 1985 Animal A Year Of The Ox And What It Means
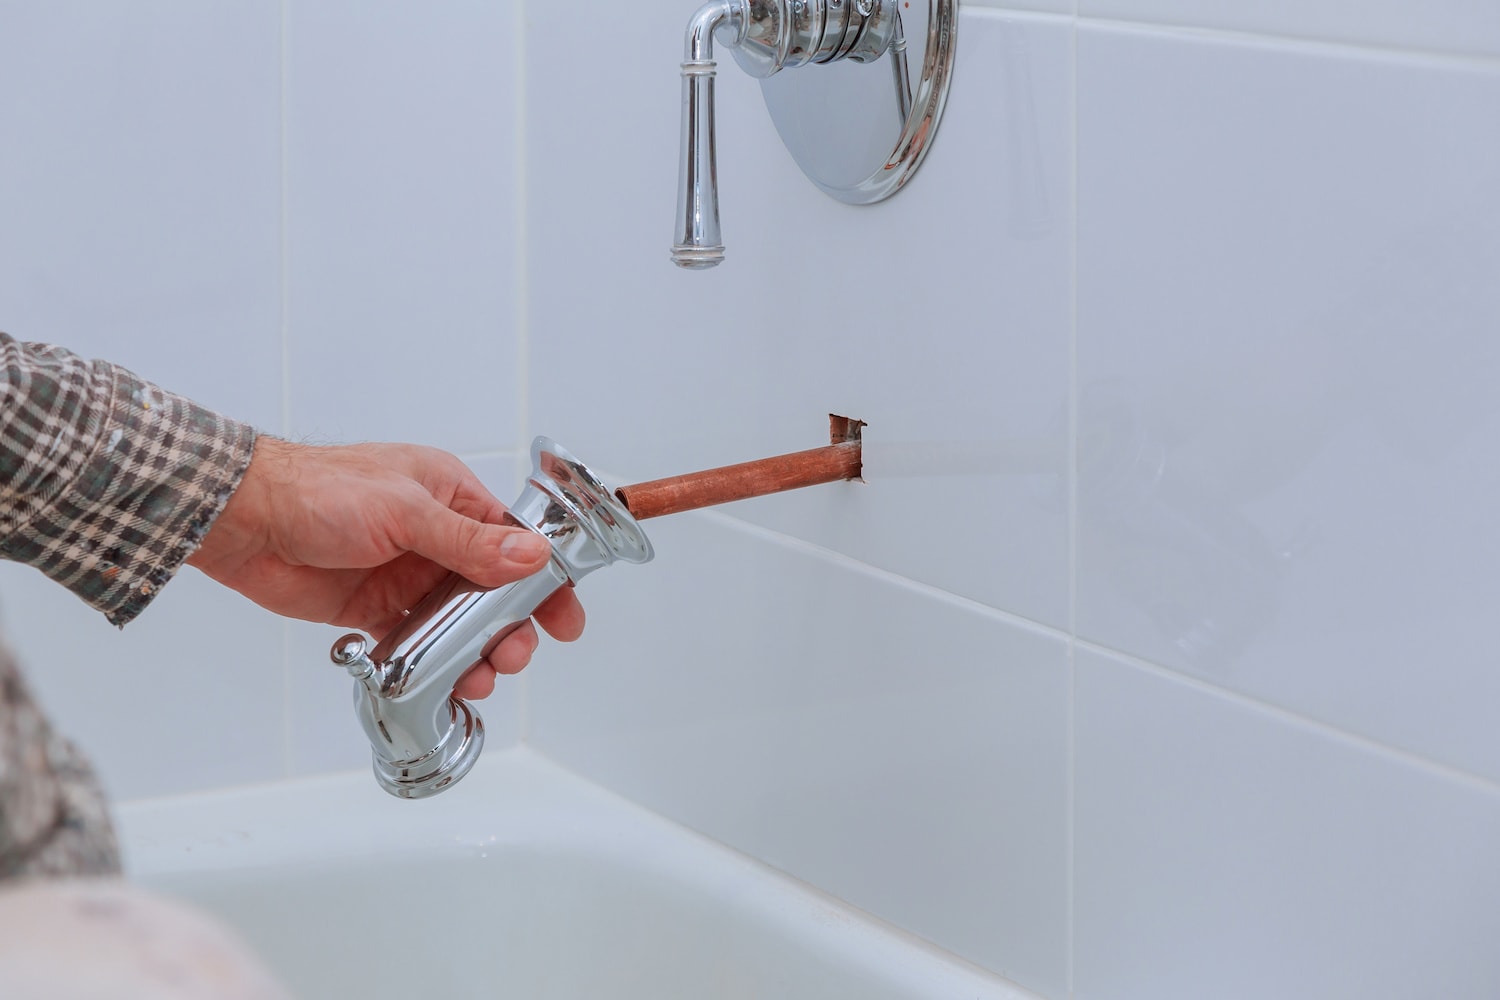
Step 3: Remove the Old Faucet
Now it’s time to remove the old faucet. Start by unscrewing the handle using a screwdriver. Be gentle; you don’t want to damage the surrounding area. Once the handle is off, use an adjustable wrench to unscrew the nuts holding the faucet in place. Carefully pull the faucet out of the wall.
Step 4: Clean the Area
Before installing the new faucet, make sure the area is clean and free of debris. Use a cloth to wipe away any old caulk or mineral deposits. This will ensure a snug fit for your new faucet.
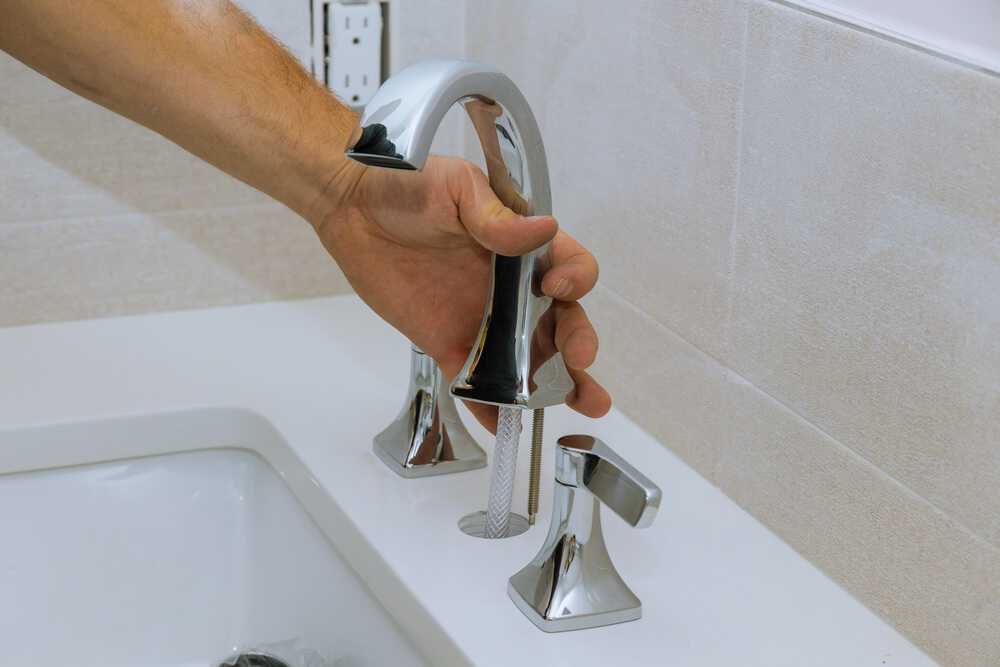
Step 5: Install the New Faucet
Now comes the fun part—installing the new faucet! Slide the new faucet into place and tighten the nuts using your wrench. Make sure everything is secure but don’t overtighten, as this can damage the faucet.
Step 6: Apply Teflon Tape
Wrap a few layers of Teflon tape around the threads of the faucet. This will help prevent leaks and ensure a tight seal. Don’t skimp on this step—it’s important!
Step 7: Reattach the Handles
Once the faucet is in place, reattach the handles using the screws provided with your new faucet. Make sure everything is snug and secure.
Step 8: Turn the Water Back On
Now it’s time to test your handiwork! Slowly turn the water supply back on and check for any leaks. If everything looks good, congratulations—you’ve successfully replaced your bathtub faucet!
Tips and Tricks for a Perfect Installation
Here are a few extra tips to help you ace this project:
- Take photos of the old faucet before you remove it. This can help you remember how everything fits together.
- Use silicone sealant around the base of the faucet for an extra layer of protection against leaks.
- If you’re unsure about any step, don’t hesitate to consult the manufacturer’s instructions that came with your new faucet.
Common Issues and How to Fix Them
Even the best DIYers run into issues sometimes. Here are a few common problems you might face and how to fix them:
Leaking Faucet
If your new faucet is leaking, double-check that you’ve applied the Teflon tape correctly. Sometimes, a small adjustment can make all the difference.
Difficulty Removing the Old Faucet
Old faucets can be stubborn, especially if they’ve been in place for years. Use penetrating oil to loosen any rusted or stuck parts. Be patient and take your time.
Choosing the Right Bathtub Faucet
Not all faucets are created equal, so it’s important to choose the right one for your bathroom. Here are a few things to consider:
- Style: Do you want a modern, minimalist look or something more traditional? Choose a faucet that matches your bathroom’s overall aesthetic.
- Finish: Faucets come in a variety of finishes, from chrome to brushed nickel. Pick one that complements your existing fixtures.
- Features: Some faucets come with additional features like thermostatic controls or touch-sensitive technology. Decide what’s important to you before making a purchase.
Cost Savings and Long-Term Benefits
Replacing your bathtub faucet yourself can save you hundreds of dollars in plumbing costs. Plus, a new faucet can increase the value of your home, making it a smart investment. Think of it as a win-win situation!
Conclusion
Replacing a bathtub faucet might seem intimidating at first, but with this guide, you’ve got all the info you need to tackle the job like a pro. Remember, the key to success is preparation and patience. By following these steps, you’ll not only save money but also gain valuable skills that you can use for future DIY projects.
So, what are you waiting for? Grab your tools and get to work! And don’t forget to share your experience with us in the comments below. Who knows, you might inspire others to take on their own DIY projects. Happy renovating, champ!
Table of Contents
- Why Replace Your Bathtub Faucet?
- Tools and Materials You'll Need
- Step-by-Step Guide to Replacing Your Bathtub Faucet
- Tips and Tricks for a Perfect Installation
- Common Issues and How to Fix Them
- Choosing the Right Bathtub Faucet
- Cost Savings and Long-Term Benefits
- Conclusion
:max_bytes(150000):strip_icc()/how-to-replace-a-bathtub-faucet-5210836-05-e72bbfbac60a49ef9f3e19d7c512fcdd.jpg)

:max_bytes(150000):strip_icc()/how-to-replace-a-bathtub-faucet-5210836-05-e72bbfbac60a49ef9f3e19d7c512fcdd.jpg&description=So, you've finally decided to tackle that bathtub faucet replacement project yourself? Good move, champ! Replacing a bathtub faucet isn’t just about fixin)